Here is the detailed process of the anodizing i used for the Ti Sentry WIP:
My other posts about Ti anodizing experiments are available here (so you can know my setup):
http://forum.multitool.org/index.php/topic,64155.msg1214184.html#msg1214184
http://forum.multitool.org/index.php/topic,64155.msg1214590.html#msg1214590Anodized Ti has the following properties:
- It takes the following colors in order when a current is applied:
[here are only the one i can achieve with my setup]
gold > bronze > violet > deep blue > light blue > white-bluish-grey (> yellow ...)
- The anodized (colored) part has an oxide layer on top of it (that gives the color) that can me remove with simple sanding (the higher the color in the spectrum, the thicker the layer, so the harder the sanding).
- When a color in the spectrum is achieved, it won't revert to any lower color, i will only turn into a higher one if an higher voltage is applied.
- More than "voltage" it is "voltage/area/time" that counts: meaning that the smaller the surface the higher the color when making dots and the shorter you'll need to wait.
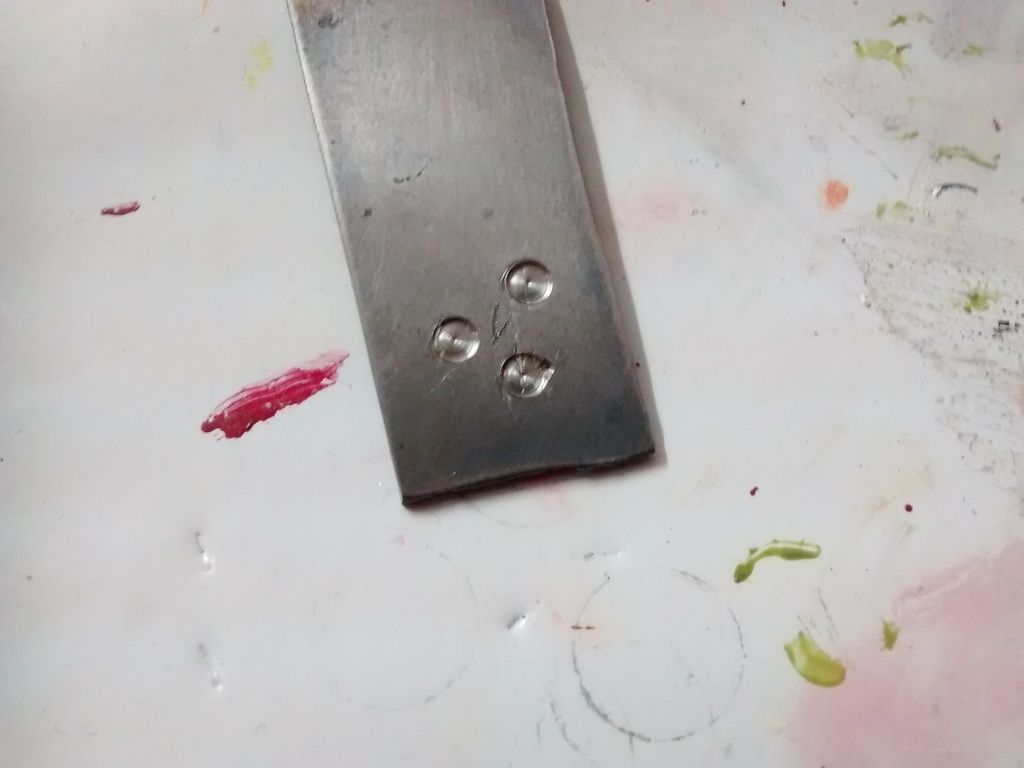
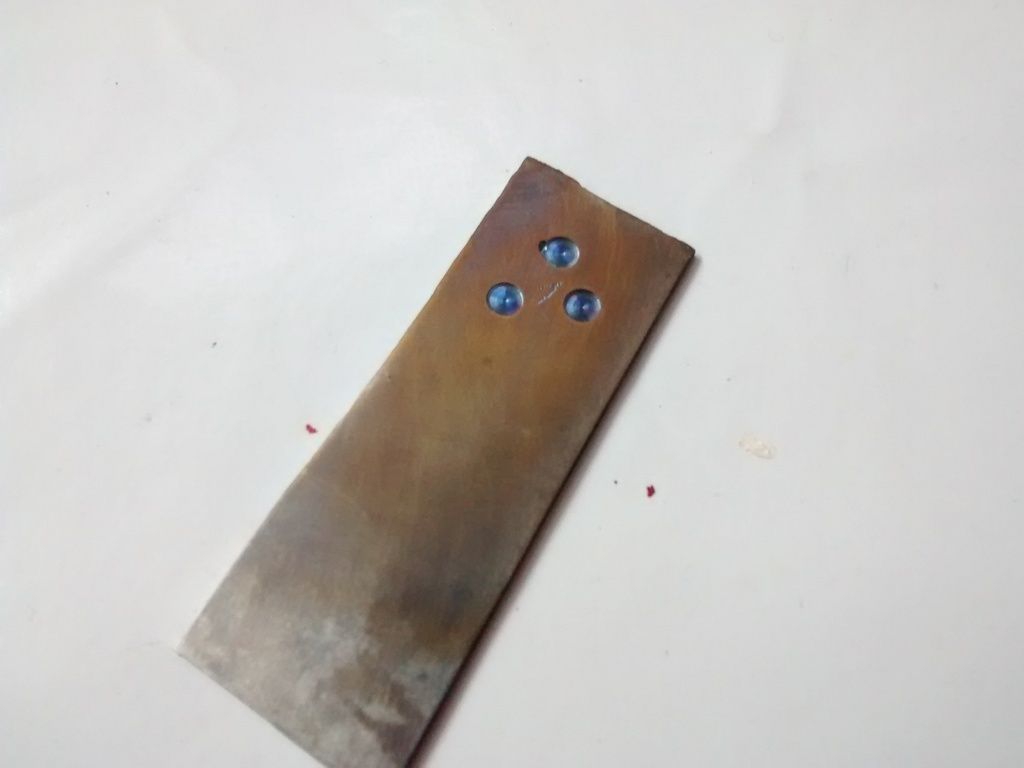
For a start let's say we want deep-blue/violet dots on an even bronze surface1- make the scales to their final shape and then, drill dead holes, or mill a pattern (note the scratched surface, it is intended to show that any scratch will get anodized and higly visible on the finish product)
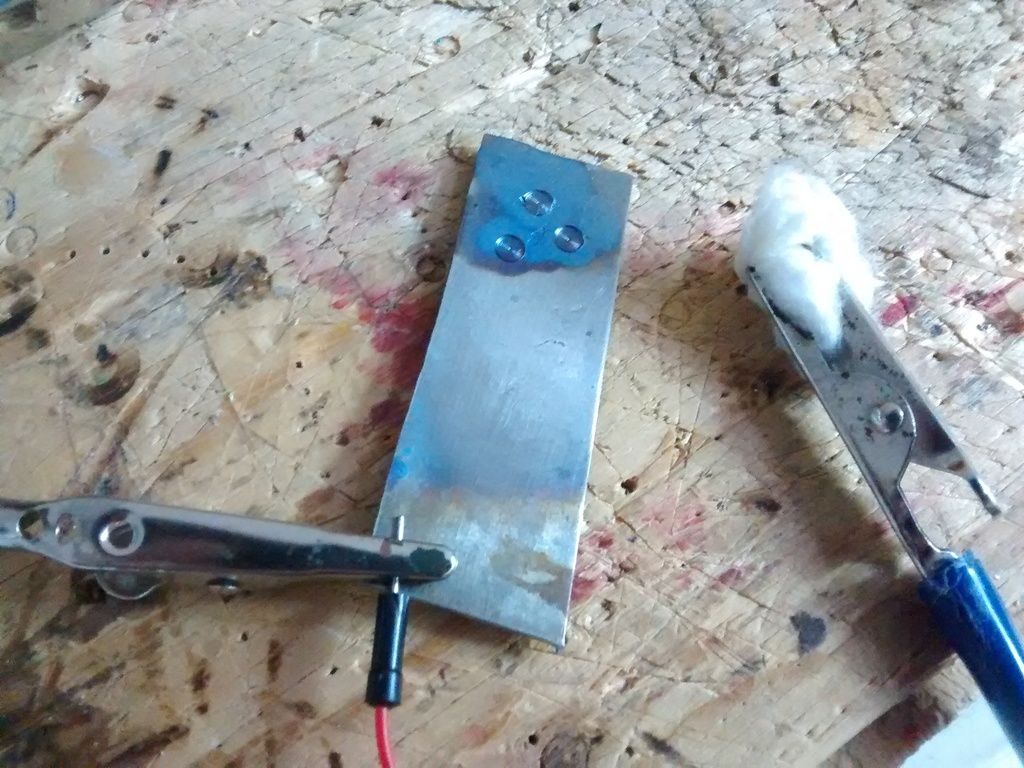
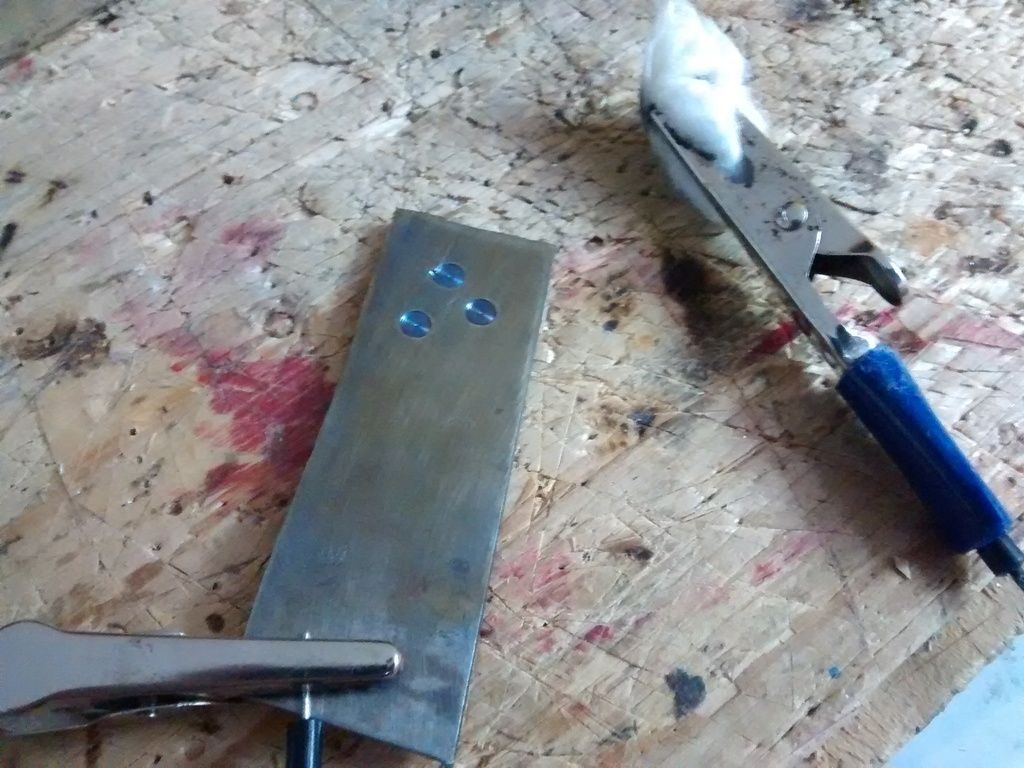
2- Anodizing (1)
The scale is connected to the anode of the electrolysis system (the + side), the cotton dipped in electrolytic solution (lemon juice in my case) is connected the cathode (-). I used a 34V PSU this time.
Simply apply the cotton on the Ti surface where the dots are: the longer you wait the higher the color in the spectrum ==> check frequently the color not to go above the wanted one!!
If you went to far, re-drill/ re-mill to remove the oxide layer in the pattern.
3- Sanding
To only keep the color in the dead holes or the milled pattern, simply sand the Ti surface (here for demo grit 320 is enough)
See how visible the scratches are now that they are blue!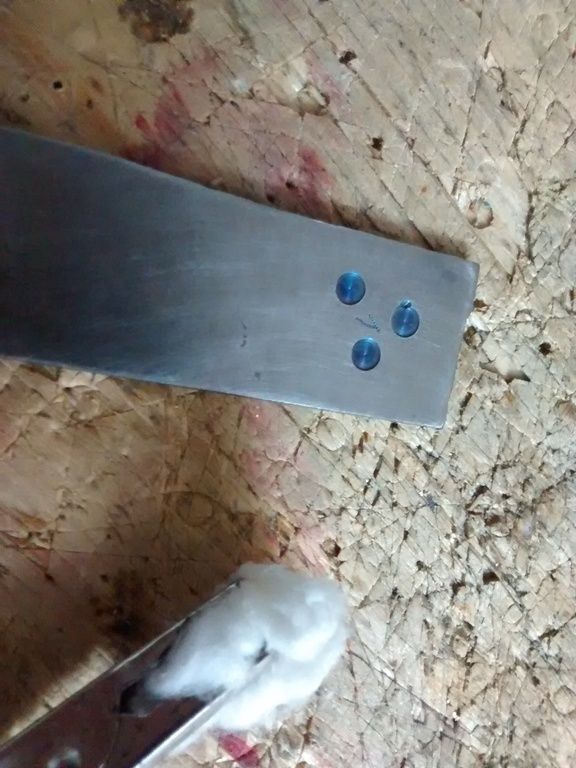
4- Anodizing (2)
Two cases here:
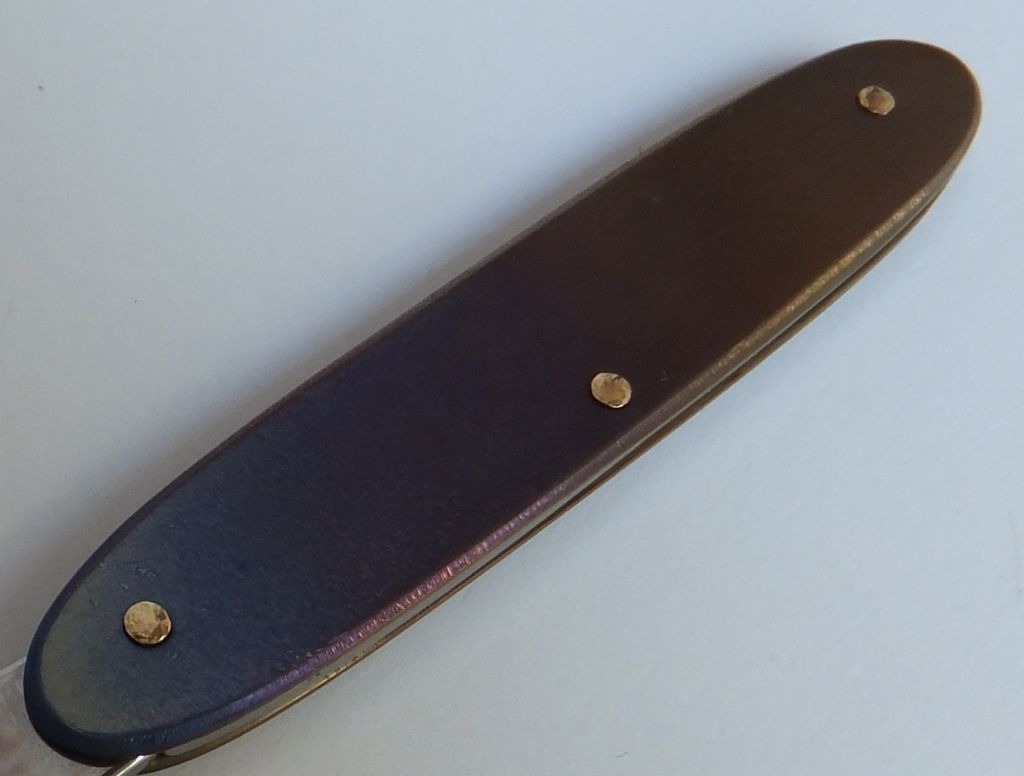
- You want an even surface -say bronze-: Take a lower voltage (like 12V) and make even passes on the Ti surface with the cotton at constant speed!
Here the the crocodile clip prevented to anodize the whole surface, hence the un-even result. To anodize the whole surface either tape the + wire to the back of the scale or use a conductive surface as worktable to which the wire is clamped.
Repeat until you get the color wanted, here if you go too far... go back to 3- Sanding.
- You want shading colors from a higher color in the spectrum to a lower one:
Take same or lower voltage as first step (here 34V or less) and vary your speed -the same way for each passes-.
The slower you go, the higher the color:
slow ==> bluish, fast ==> bronze/gold
 To get the opposite result: a pattern in a lower color (like bronze/violet) and the rest of the scale in a higher colore (light blue) you need to swap some steps and remove sanding:
1- Anodizing
2- Milling the pattern
3- Anodizing the pattern (using a lower voltage than whole scale)
This method implies a few things:
Don't fail the pattern anodizing ==> it will mess with the whole scale color
Don't scratch the scale while milling the pattern after the first anodizing...
Hope you enjoyed


