Multitool.org Forum
+-

Hello Lurker! Remove this ad and much more by logging in.


Step by step on making a leather sheath

Offline landroza

  • Full Member
  • ***
    • Posts: 100
Step by step on making a leather sheath
on: July 22, 2010, 06:16:01 AM
In this post, I'll try my best to show you the entire step by step of making a leather pouch. Hopefully this will serve as a very informative educational reference material for the members in this forum. Will try to explain by photos and minimum of explanation if the photo really can speak a thousand words.

Here we go.. 1st get a rough measurement of the leather and cut into size.

Make a line at the edge by using stylus

Make some folding lines at the back of the leather to have an easier folding during wet forming. You can use a cutter knife of some hard object.


Soak it into pool of water (room temp water) for about 8~10min until the leather having soft feeling like a canvas.


to be continue


Offline landroza

  • Full Member
  • ***
    • Posts: 100
Re: Step by step on making a leather sheath
Reply #1 on: July 26, 2010, 05:01:03 AM
Place the soaked leather piece on the tools/knife


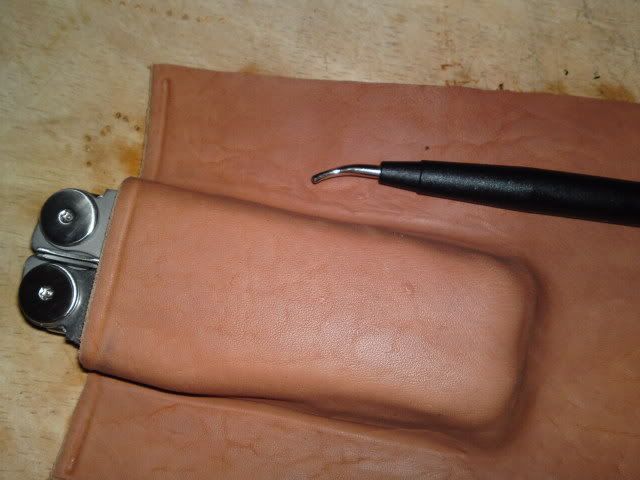
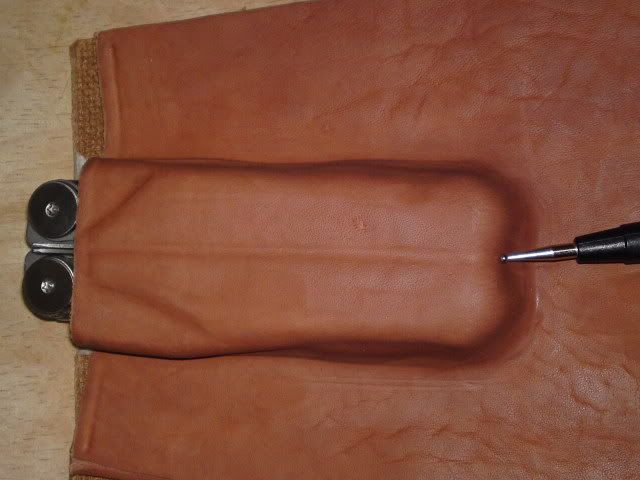
First use your fingers to press into shape follow by using a stylus or like my previous project I used a Korean SS chop stick. Be carefull to avoid pressing with your finger nails, else you will have finger nails mark later on. For the edge / corner area, it will take longer time to form. Do not force.

Try to make a mold according to the shape of tool or knife, you will have a very nice press and the out come will be better.

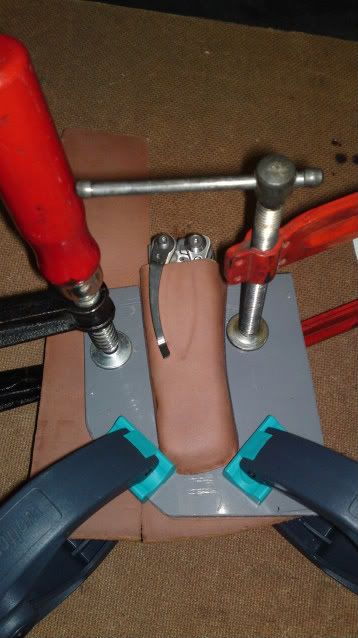
Else, use a wall poster stapler and nail the leather on a piece of wood.

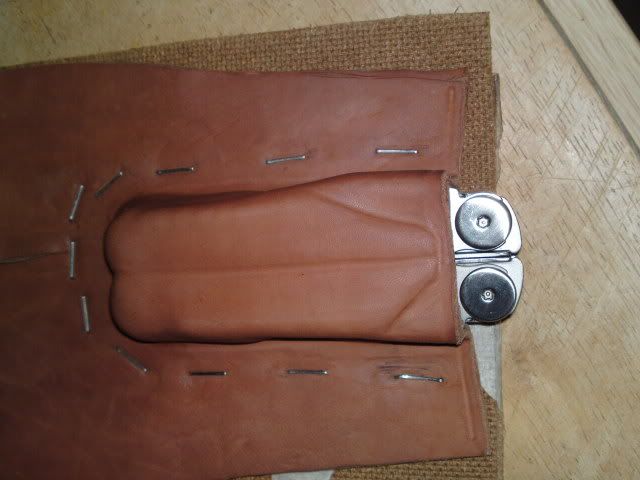
Let it dry for day or two, usually the leather will return back to it original color when it dried up. See the different.

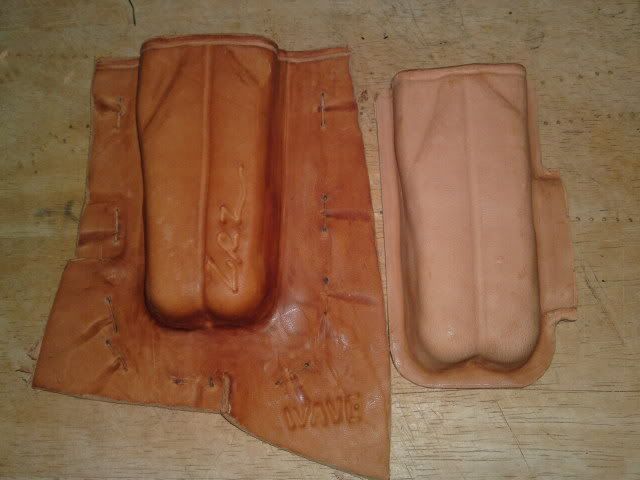
The one on the right is for WAVE and 2AA Maglite Combo sheath, I had cut it into the final shape. There will be sharp edge on the area we cut and it has to be trimmed (can call it bevel) to get a smoother finishing.
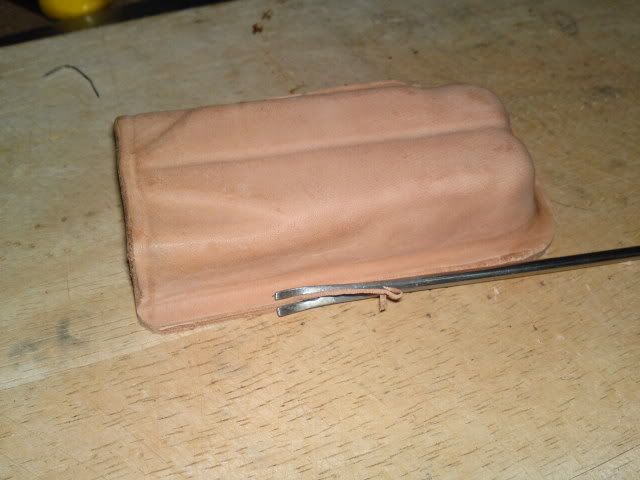
I do not have a nice looking and sharp BEVELER, so I made myself one from a 3.2mm SS TIG welding rod. It might not have the professional look but it works and cuts like one.


to be continue


spam Offline glorn

  • No Life Club
  • ******
    • Posts: 1,223
  • His name is Robert Paulson.
Re: Step by step on making a leather sheath
Reply #2 on: July 26, 2010, 05:07:21 AM
The wet leather looks like human skin.

G


Offline landroza

  • Full Member
  • ***
    • Posts: 100
Re: Step by step on making a leather sheath
Reply #3 on: July 26, 2010, 05:52:26 AM
The wet leather looks like human skin.


but it doesn't smell like one.. you will never like the smell..


gb Offline Mike, Lord of the Spammers!

  • Chief of the Absolutely No Life Club!
  • *
  • Abandon All Hope Ye Who Enter Here...
  • ***********
    • Posts: 42,975
  • Why haven't you got a Farmer yet!
Re: Step by step on making a leather sheath
Reply #4 on: July 26, 2010, 07:19:59 AM
Great tutorial mate :tu:
Give in, buy several Farmer's!!!!!!


us Offline SlackOne

  • Sr. Member
  • ****
    • Posts: 481
  • See Saw Seen
Re: Step by step on making a leather sheath
Reply #5 on: July 27, 2010, 03:04:45 PM
Just wondering...what kind of leather do you prefer for wet forming these holsters?  Thickness and all that.  And do you hand-sew with a stitching awl or something?

Thanks for the tutorial :)
Half-ass done wholeheartedly!


Offline landroza

  • Full Member
  • ***
    • Posts: 100
Re: Step by step on making a leather sheath
Reply #6 on: July 28, 2010, 02:19:35 AM
Just wondering...what kind of leather do you prefer for wet forming these holsters?  Thickness and all that.  And do you hand-sew with a stitching awl or something?

Thanks for the tutorial :)

veg tanned cow leather (cowhide), do not use chrome tanned leather. 2~3mm thickness is perfect for wet form. I have with me 5mm type, so a lot of works require to skin it down.
The next few posts will answer the rest of your questions, stay with me mate
« Last Edit: July 28, 2010, 02:44:08 AM by landroza »


Offline landroza

  • Full Member
  • ***
    • Posts: 100
Re: Step by step on making a leather sheath
Reply #7 on: July 28, 2010, 02:24:55 AM
Next prepare the loop for maglite. Soak the precut leather like usual.


Match them up
Inside -

Outside -


The base, cover and belt loop are prepared.


They were glued together onto the base.

Note that the stitching holes are marked by using this:

You can modify it by removing the teeth to get the gap you like. I made myself 2 with 3mm and 5mm gap. The original come with 1.5mm gap, which is good for thinner chrome tanned leather.

Since the owner doesn't like to have the thread to be same color like the pouch, I dye it before the stitching process.

1 layer of dye.

2 layers of dye.

Finished with KIWI shoes polish.


While waiting for the dye to dry up, I use a burnisher to burnish the edge of the leather to have a smoother finishing round look.


Burnisher - can use hard object such as hard wood, teflon or even a cheap plastic lighter. I'm using a made in India SS burnisher.

« Last Edit: July 28, 2010, 02:45:05 AM by landroza »


Donations

Operational Funds

Help us keep the Unworkable working!
Donate with PayPal!
April Goal: $300.00
Due Date: Apr 30
Total Receipts: $122.41
PayPal Fees: $6.85
Net Balance: $115.56
Below Goal: $184.44
Site Currency: USD
39% 
April Donations

Community Links


Powered by EzPortal