Multitool.org Forum
+-

Hello Lurker! Remove this ad and much more by logging in.


Gerber Diesel gets the saw coupler it should have had originally

Offline dcohalla@sbcgobal.net

  • Newbie
  • *
    • Posts: 19
As many of you know, I own my fair share of multitools. Okay, not as many as Def...but then again, Leatherman only has about 6 more tools in their warehouse than Def has in his house.

One of my favorite stand buys is the Gerber Multitool 600 series. This is the one that the pliers head is recessed in the tool and can be flicked out into a locking position with the flick of your wrist. It's really a cool design, and the "flickable" pliers are very easy to engage one handed, which has saved my bacon more than a few times.
See Gerber's page about it here:<a href="http://www.gerbergear.com/product.php?model=7540G" target="_blank">http://www.gerbergear.com/product.php?model=7540G[/url]
(okay, this is the newer version of the MP600 that has come out since the Diesel...but you get the idear. It's basically the same set up, but they've fixed a few blades and added tungsten carbide cutter inserts at the wire cutters--a feature that carried over from their upper end multitools of past.)

Gerber has recently come out with a beefed up version of the 600 series, called the Diesel.; There are MANY upgrades to the tools and pliers head. For a good, overall review, see here:<a href="http://multitool.org/content/view/85/72/%C2%A0" target="_blank">http://multitool.org/content/view/85/72/[/url]
(Thanks J-Sews for the great review!!)

The one thing that Gerber did away with on the new and improved model was the saw coupler. This coupler allowed you to exchange the blades for whatever type of jigsaw blade that you could find that would fit. (more specifically, they had to have a hole in the tang for the retaining wire to fit into. You'll see what I mean in the pics.)

Well...it just so happens that the implements on the 600 series are directly compatible with the design of the Diesel. The tool orientation is a bit different between the two tools, but I was able to rearrange two implements and remove the lanyard loop--which in all honesty doesn't get used on my multitools-- and get the coupler from a 600 that I had to fit into the Diesel. Now I have a much more usable Diesel for the tasks that I need it for. It's amazing what the gain of one different variation of an implement will make.

Okay, here's the pics:

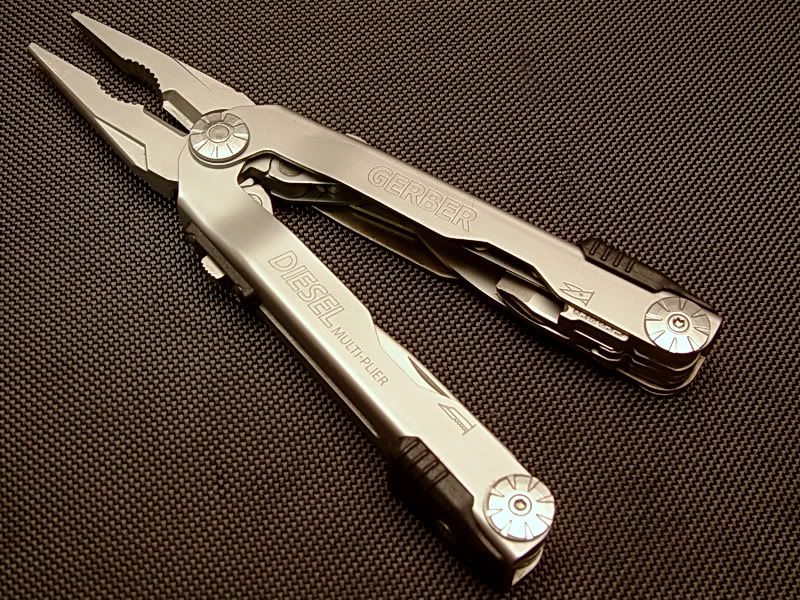
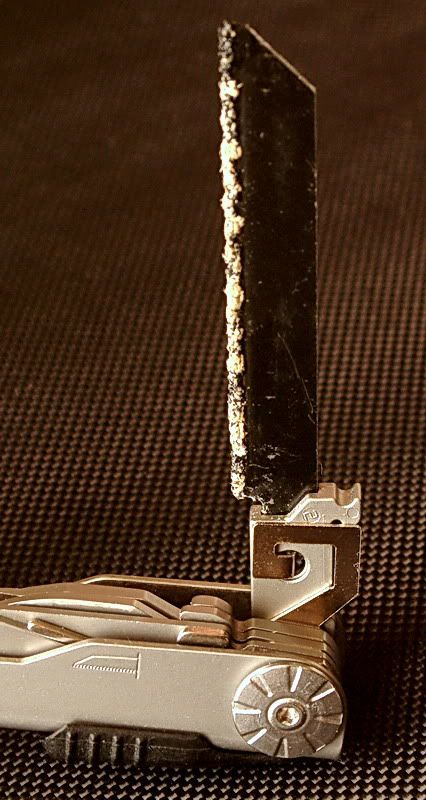
Here's the full length tool, after the change out.


" border="0

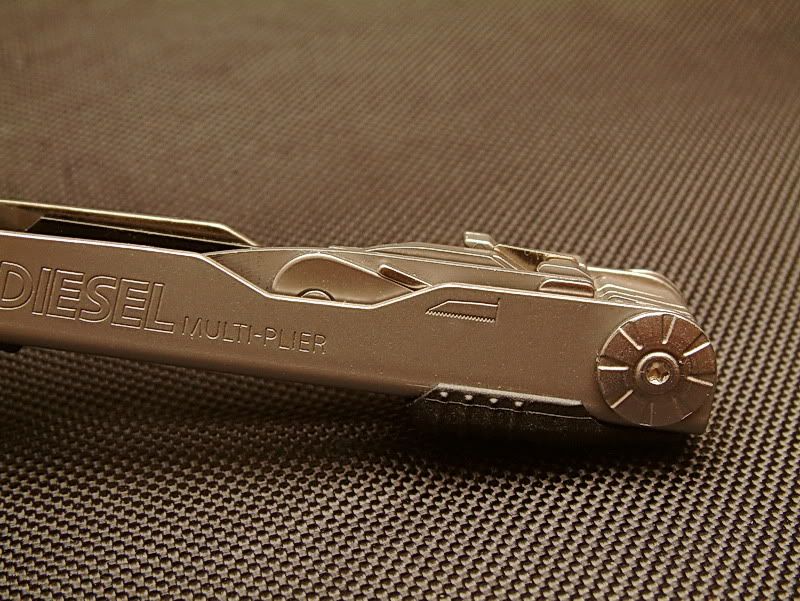
The next few pictures are of the end of the tool that I modified. Sorry, but I didn't think to take a before picture. I'm sure i have one in my pics somewhere...I'll have to see if I can dig it up.

" border="0

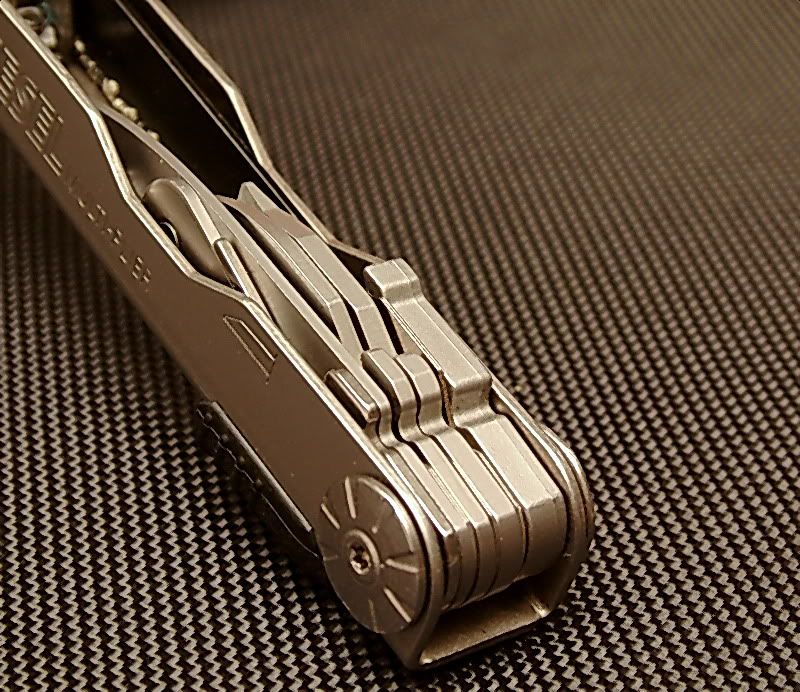
you can see here that the markings on the side of the tool that tell you what implement is behind that cutout are no longer correct, but I'm a "fart smeller" and can pretty much figure it out without the little drawings to assit me.  :D

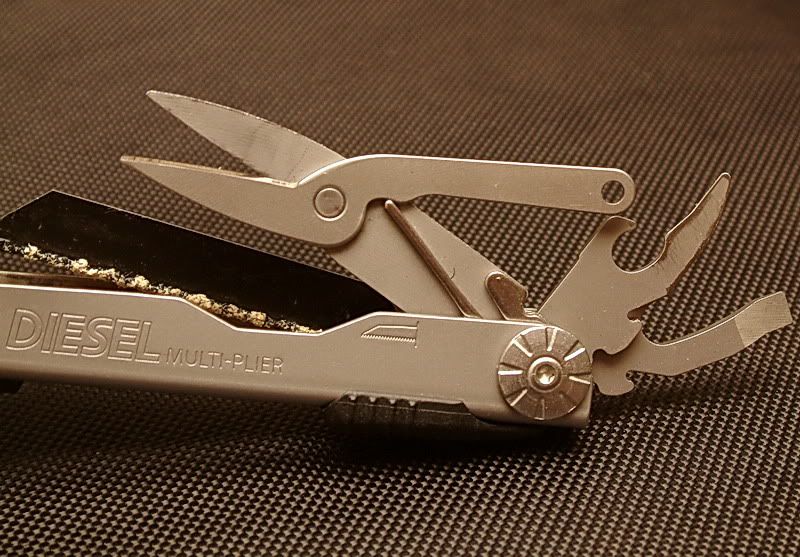
The white stuff on the saw blade is plastic from a toilet flush valve tube that I cut off yesterday. The blade that is in it now is the blade that comes standard with the 600's. It's called a RemGrit blade. It can cut pretty much anything, but it really excels at harder steel and porcelain. It doesn't have teeth, per se, rather a bunch of really abrasive powder and grit that abrades its way through whatever you are cutting. Downside is that it accumulates crud from whatever you cut. Usually I have a fine tooth hacksaw type blade in there, but didn't have one handy for the pics.

" border="0

" border="0

" border="0

Okay, here's a few pics from the disassembly.

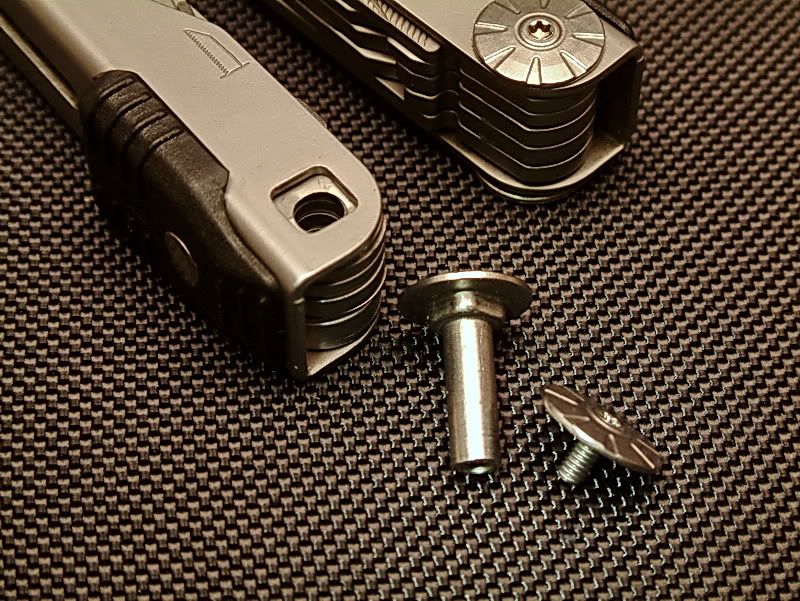
This one is of the pivot pin. If your familiar with the previous Gerber 600's, you'll notice that it's a bit different than the previous arrangements.

" border="0

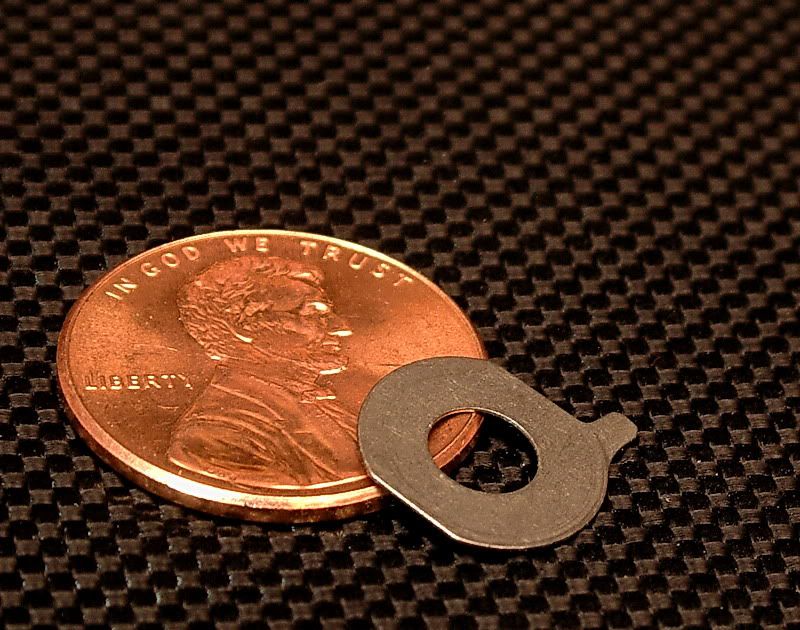
Here's a picture of the shims/spacers that they use to keep the tools separated and allow you to pull out one tool at a time. Putting these back in can, sometimes, be a real PITA...but the secret is to line it up with the tab forward and down. Then when you get all the implements and spacers you want in, pull the locking tab back and insert the pin. If you're very gentle it will all go back together very nicely and the spacers/shims will be locked into the locking tab so that they don't rotate.

" border="0

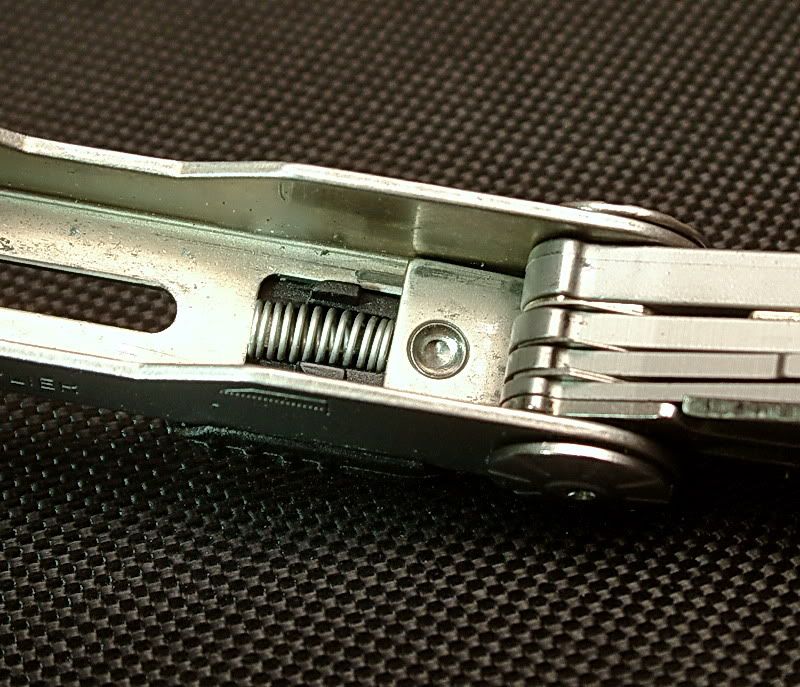
This is spring that controls the locking tab. This causes the lock to re-engage when a tool is opened up. I removed mine and stretched them out just a bit so that the lock would engage more "positively." You don't HAVE to do this, but I like it when the lock "snaps" into place... just kind of a audible affirmation that the lock did engage. Of course, I'm weird like that too. Every ball point pen that I have has been disassembled and had the springs stretched slightly to make the clicking action more "positive." It's just a "quirk" that I have.

" border="0

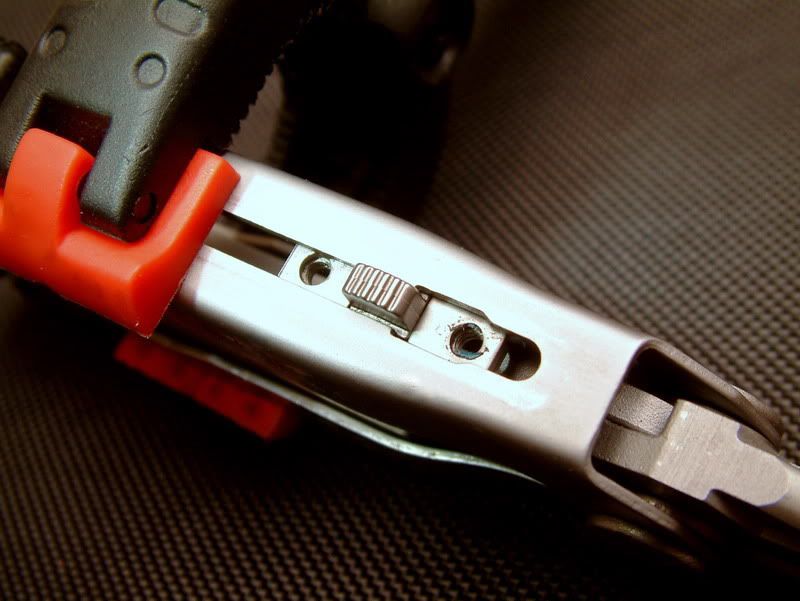
Here's the sliding pliers head lock and release button assembly with the button, spring, and retainer removed. The button has a little ledge that is held behind the oval grove on the side until it gets to the opening near the head. Once it gets to that opening, the button pops out and locks the head into place. When you want to retract the head, you push both buttons and push the head in, and this puts that little ledge beneath the oval groove again allowing the head assembly to retract back into the handles. Also note the little lumps of blue Loc-tite that was on the screws that held the button retainer on. All the screws on this tool have that Loc-Tite on them so they don't back out in use. When you're all done with your mods, it's really a good idea to put a little dab of NON-permanent Loc-tite on each screw for the same purpose...especially if you're hard on tools like I am.

" border="0

Here's the remainder of the button assembly. These springs were stretched too so that the button popped out and locked more "positively." (It's a sickness I have, I tell ya!!)

" border="0

This is a pic of the button and spring put back into the head assembly and pushed down the slide channel a bit to keep everythingn in place. The clamp keeps everything tight and keeps the spring loaded parts from shooting into hidden corners and crevices in my dining room.

" border="0

Well fellas, that's pretty much it. All in all, it was a fairly easy changeout. Sure there's a few smallish pieces, but it's mostly about patience and perseverance. It all came out of there, so it must all go back in there.
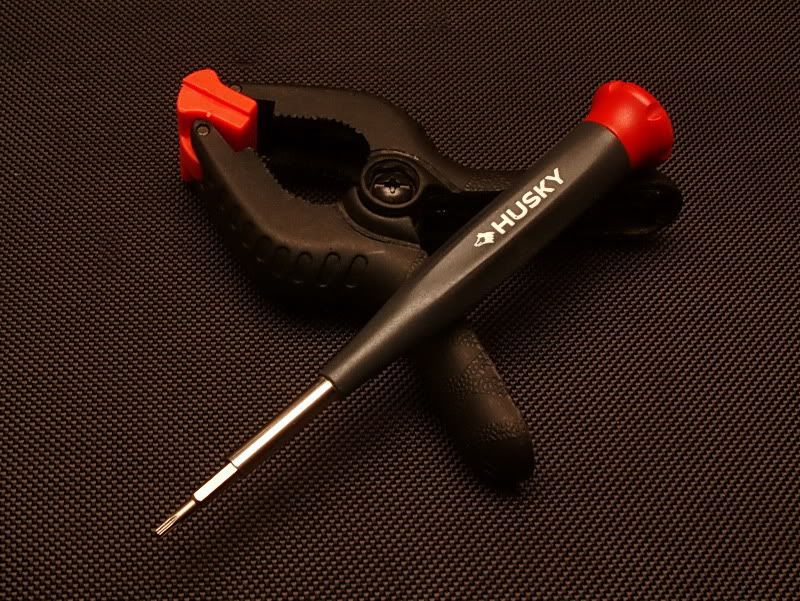
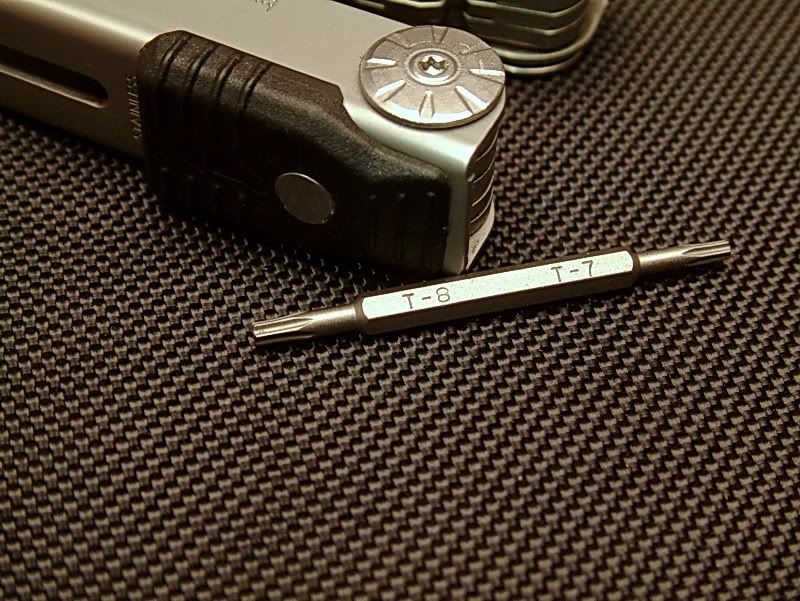
And, oh yah, these two tools make it much easier. A T8 torx bit/driver and a padded spring loaded clamp.

" border="0

" border="0

I have been carrying my newly modified tool a bit more now since I know that the saw bit I have in there now will work for the things I need to cut. And if it doesn't, I can at least now swap the blade out for one that will. Why Gerber opted to not put this patented saw coupler, which was a prime feature of their 600 series, into this "new and improved" version I'll never know. But with a little ingenuity and planning, I managed to re-engineer it to include it.

You may notice that there's some scuffing on the scissors and some of the other implements...that from sharpening and from use. The scissors are Gawd awful sharp now thanks to my Spyderco Sharpmaker.

Okay...Drewpy out. Thanks for looking.

(NOTE:  The above is a re-post from a forum on which I'm a moderator.  The guys there aren't quite as "in" to multitools as y'all here...so I apologize if I explained some of the more basic stuff a bit too much... and also, I'm known as Drewpy Dawg over there.   O0)


ca Offline Grant Lamontagne

  • Head Turd Polisher
  • Administrator
  • *
  • Just Bananas
  • *
    • Posts: 65,935
  • Optimum instrumentum est inter aures
Thanks for posting it here Drew!  I am certain the members here will be very appreciative of it!

Def
Leave the dents as they are- let your belongings show their scars as proudly as you do yours.


us Offline J-sews

  • Admin Team
  • *
  • Absolute Zombie Club
  • *
    • Posts: 23,220
Great post Drew! Wonderful pictures too I might add.

So it looks like you got rid of the regular saw blade from the Diesel too? (as well as the lanyard loop) The saw coupler is a "double wide" so I'm guessing you needed to swap out two things in order to make room for it.

Dontcha wish Gerber (and Leatherman, and others) would follow SOG's lead and offer individual blades and implements for sale seperately?
In order to be certain of having the right tool for every job.........one must first acquire a lot of tools


Offline dcohalla@sbcgobal.net

  • Newbie
  • *
    • Posts: 19
J-Sews...yup and yup.   :P

I had to remove the original saw blade and the lanyard ring, and because the tools are reversed on the original MP600, I had to swap the saw and scissors side-for-side on the diesel to make sure that the blade of the saw didn't interfere with the pliers opening and closing.

One idea I have tossed around in a similar vein to extra tools available is a "modular multitool" of some sort.  Start with a basic unit, and have tools and components interchangeable.  So that you could "build your own" multitool to suit your needs.   Offer one or two basic configurations with a slew of components.  There could be outside components and inside components....etc. 

Have often thought that same would be really cool for SAKs.

Just never got past the "tossin it around in the old rock box" stage.   :P


us Offline J-sews

  • Admin Team
  • *
  • Absolute Zombie Club
  • *
    • Posts: 23,220
.....One idea I have tossed around in a similar vein to extra tools available is a "modular multitool" of some sort.  Start with a basic unit, and have tools and components interchangeable.  So that you could "build your own" multitool to suit your needs.   Offer one or two basic configurations with a slew of components.  There could be outside components and inside components....etc.......

Boy Drew, you'd best be careful talking about that sort of stuff around here. Guys will start offering to show you their Man-Tool!  :P

Link: http://www.mymantool.com/builder/mantoolBuilder.html
In order to be certain of having the right tool for every job.........one must first acquire a lot of tools


Offline dcohalla@sbcgobal.net

  • Newbie
  • *
    • Posts: 19
OMG...I'm not sure I wanna see anybody's "mantool"   :laugh: :laugh: :laugh: :laugh: :laugh:

So whats the deal with that??  Just a clever little webpage?  Or does someone really offer that?

Gerber has come the closest with their BYOT...but what I'm talking about is more along the lines of interchangeable tools.  SO you can change parts randomly...


us Offline J-sews

  • Admin Team
  • *
  • Absolute Zombie Club
  • *
    • Posts: 23,220
:D
The ManTool website is something we were talking about here a couple months ago. Apparently some genius in New York City had this "new, revolutionary idea" to allow people to custom spec their own multitool. (No mention was made of the fact that Gerber had done this very thing a few years ago!) Anyhow, he tried to sell his revolutionary concept on eBay for a million dollars, but nothing came of it. I'm surprised the web page is still up.

I like your idea better though, where a guy could swap tools out at home. I wonder if the hook-up method on the glass saw blade of Vic's new Rescue Tool would be a way to do this? The glass saw (and the glass breaker) snap in and out for replacement. Seems to me the same concept could be used on a multitool to allow various types of blaes to be substituted into the same set of handles.
0_8623_N.jpg
* 0_8623_N.jpg (Filesize: 19.13 KB)
In order to be certain of having the right tool for every job.........one must first acquire a lot of tools


Offline dcohalla@sbcgobal.net

  • Newbie
  • *
    • Posts: 19
Bob

I was thinking along that line or a multi with removable scales...and you could sell different sized removable pivot pins...add on tool groups even.  Maybe a module of tools.  Like one module would have a philllps and a can opener, etc. The added liners would add strength to the handles too...  I haven't set it down to paper yet to work out the logistics...but it certainly seems plausible. 


Offline damota

  • Sr. Member
  • ****
    • Posts: 422
I did (I admit easier) mod to the MP600 Cable Cutter to put the blade adapter on to it. Thanks for the photos of the axle modifications Gerber has made to the Diesel, it looks as if it will be easier to see what you are doing with that larger square hole to look down as you line everything up. My Diesel should be here by next Friday and I am hoping to change the partly serrated blade for the one in the Suspension and that photo of yours along with Bob's review has helped already.
Thank you both,

Dave


spam Offline glorn

  • No Life Club
  • ******
    • Posts: 1,223
  • His name is Robert Paulson.
Well, I went ahead and pulled out the mini torx and set to work. Now I did not take pictures, but I'll snap some of the finished job later.

I managed to remove the lanyard and the smallest flat head driver, and replace it with the saw coupler from my old (and rather worse for wear) Scout. I put the coupler just inside of the wood saw, so that side is equipped as follows:

wood saw
saw coupler
large flat head driver
scissors

Of course I cannot leave a blade in the coupler and close it, but this doesn't really bother me at all. I'll toss the Remgrit and maybe a few others into a small plastic case.

I really am pleased with the result, but I do wish I had waited until I got ahold of a sheepsfoot blade to replace the stock 1/2 and 1/2. Why? Well, because it means I will have to take that side apart again, and I am not kidding when I say that the little spacers are a b*tch to put back. And getting that last little plain washer in there is no picnic either.

I noticed that they used a few extra spacers, but sadly I didn't notice where they came from until after they all fell out on disassembly. Anyway, I got one in between each implement and that seemed fine for the one side. On the other side this left too much play, so I added one extra in there and it solved the problem.

I suppose as things loosen up I may need to add these additonal ones back in, but for now they went into a baggie with the one that was removed due to the coupler being double wide.

All in all, I will say that if you really want to swap some of the tools in your Gerber, by all means do so. But be prepared to "practice" several times with getting it all back together again. The note above about setting the spacers with the little tab so that they are not in the slot, but facing down and toward the end opposite the pliers is damned good advice. Once everything is in place, but before the axle is pushed into the screw side, you can carefully pull back the lock release slider and use something small (I used the broken small flat head off the old scout) to push the spacers tabs into the slot one at a time. Once they are all in, quickly pop the axle into  position, release the lock slider, and secure the screw.


Thanks for all the tips fellas. Hope my experience adds to the confidence of someone who may be on the fence about this.


G.

   
G


Donations

Operational Funds

Help us keep the Unworkable working!
Donate with PayPal!
April Goal: $300.00
Due Date: Apr 30
Total Receipts: $122.41
PayPal Fees: $6.85
Net Balance: $115.56
Below Goal: $184.44
Site Currency: USD
39% 
April Donations

Community Links


Powered by EzPortal