Multitool.org Forum
+-

Hello Lurker! Remove this ad and much more by logging in.


SAK Assembler

Offline scibeer

  • *
  • Sr. Member
  • ****
    • Posts: 427
SAK Assembler
on: June 01, 2008, 05:51:44 AM
I originally put SAKs together "freehand" trying to get the layers to stay together while compressing springs and juggling tools.   If you've ever tried it, you'll know how frustrating it can be.

I made this jig to hold the pins steady as layers are added and wanted to share it here.   The jig takes minutes to make and will simplify things a lot.

Start with a piece of corian, sturdy wood, thick plastic, micarta or whatever you can find.    Figure out the pin sizes you need for the mod and find drill bits just a hair larger than the pin diameter (I mean it!  1 or 2 thousanths over the diameter of the pin for best results)

A decent set of fractional drill bits can be found at knifekits.com that has all the sizes you need and lots more for around $35

Use one of the liners fro the SAK you're modding as a template for drilling the hole patterns into your SAK platform.

Set the liner close enough to the edge so when you are assembling, you can use the edge of the platform as a pry point for your pliers for compressing the springs.

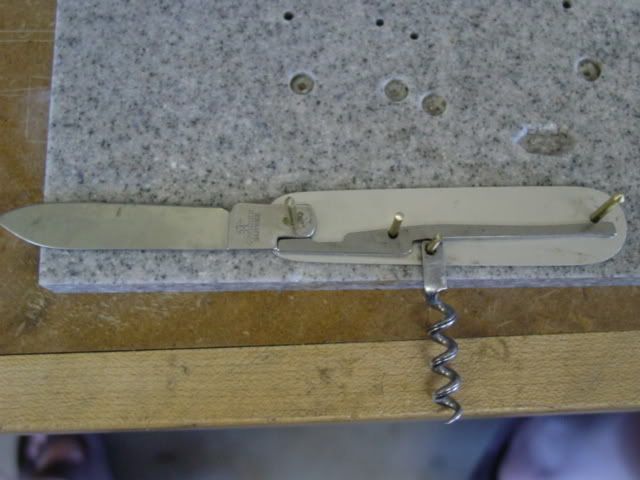
Check out the pictures below and it should make sense.

The tighter holes you drill and the deeper the hole you use, the stronger the system will be and the easier it will be to put the knives together.

Here are some pin sizes and the drill bits I use that work well

84mm SAK - uses 0.085in pins (2.25mm)  - Drill holes that are .086-.088in about 7-10mm deep.

91mm SAK - uses .085in pins for the inside pins and .098in (2.5mm) for the outside pins.    Drill holes that are .086-.088in and .099-0.100in 10mm deep

You will waste some brass pinstock by drilling the holes deeper, but its cheap and the other alternative is to drive yourself nuts until you start breaking things which is quite a bit more costly!


us Offline Spoonrobot

  • No Life Club
  • ******
    • Posts: 1,894
Re: SAK Assembler
Reply #1 on: June 01, 2008, 06:20:47 AM
Right Click -> Select All -> Copy -> Save To Desktop.

 :)

Thanks for the information! Althought I am probably quite a way from modding my own SAKs it's really cool of you to show some of the information you had to learn the hard way.


gb Offline Mike, Lord of the Spammers!

  • Chief of the Absolutely No Life Club!
  • *
  • Abandon All Hope Ye Who Enter Here...
  • ***********
    • Posts: 42,975
  • Why haven't you got a Farmer yet!
Re: SAK Assembler
Reply #2 on: June 01, 2008, 10:01:59 AM
Great post mate, very informative :)
Give in, buy several Farmer's!!!!!!


england Offline Benner

  • Global Tuffy
  • *
  • Absolute Zombie Club
  • *********
    • Posts: 28,081
  • Just Awesome! And a Slayer of Polar Bear!
Re: SAK Assembler
Reply #3 on: June 01, 2008, 12:35:35 PM
Thanks for that Bill.  :)

Very interesting.
I'm back!!


us Offline J-sews

  • Admin Team
  • *
  • Absolute Zombie Club
  • *
    • Posts: 23,224
Re: SAK Assembler
Reply #4 on: June 01, 2008, 03:43:20 PM
Very generous of you to share that Bill. I must admit not understanding what you meant about "using the edge of the platform as a pry point for your pliers for compressing the springs" but one glance at your photo and it all makes sense.  :)
In order to be certain of having the right tool for every job.........one must first acquire a lot of tools


Offline Leatherman123

  • Absolutely No Life Club
  • *******
    • Posts: 6,568
Re: SAK Assembler
Reply #5 on: June 01, 2008, 10:41:19 PM
Thanks Bill!
B


gb Offline Neil

  • Multitool.org Main Site Manager
  • *
  • Zombie Apprentice
  • ********
    • Posts: 15,287
Re: SAK Assembler
Reply #6 on: June 03, 2008, 01:20:20 PM
Cheers Bill.  Thanks to seeing your jig over on SOSAK I never had to go through the frustration of using clips and clamps for my first mods.  The first thing I did was make a jig.   

So thank you for the hours and blood saved :cheers:

Neil
I'm not taking any more mod orders at present, sorry.


Offline scibeer

  • *
  • Sr. Member
  • ****
    • Posts: 427
Re: SAK Assembler
Reply #7 on: June 05, 2008, 05:21:37 AM
I'm glad it was useful to someone.   

I bled plenty for the both of us my friend!


Offline porteiro

  • Full Member
  • ***
    • Posts: 106
Re: SAK Assembler
Reply #8 on: May 27, 2010, 07:00:45 AM
I know this is an old thread, but...

Once you have the knife assembled on the jig, how do you then transfer it to the pins that have one end peened over?

Or do you peen over the pins in place in the jig?


Offline scibeer

  • *
  • Sr. Member
  • ****
    • Posts: 427
Re: SAK Assembler
Reply #9 on: May 28, 2010, 04:49:34 PM
The pins I assemble the knife on in the jig are the pins I peen.   I don't flatten out one side first.   Both sides are normal pinstock when I'm done assembling.   I pull the knife off the jig (carefully!) and peen each side after trimming and grinding the pins to the correct length with pliers and a dremel or belt sander.   

Rest one side of the pins on a piece of metal or little anvil of some kind to peen against.   Does that help?


Offline porteiro

  • Full Member
  • ***
    • Posts: 106
Re: SAK Assembler
Reply #10 on: May 28, 2010, 05:10:39 PM
Yes.  That's exactly what I wanted to know. :)


Donations

Operational Funds

Help us keep the Unworkable working!
Donate with PayPal!
May Goal: $300.00
Due Date: May 31
Total Receipts: $86.45
PayPal Fees: $5.07
Net Balance: $81.38
Below Goal: $218.62
Site Currency: USD
27% 
May Donations

Community Links


Powered by EzPortal